
TE
@Terry Cockerell
Terry I think it depends on you which way you place the fence. I'm not ready to install mine yet but I do known Stan "rents" a tool for this job. Supposedly we start bending the end and begin install on either end. The make the final bend on the other end of the trim before its clipped in place. The very bottom trim piece is actually three pieces too. Thats the ONLY piece I have of the original trim from my car. Dad said safe this piece. Never loose it. I will be following this post closely.
 
 
Gary Parsons
Hi Terry,
 
I do it with the fence right side up and off the car. I insert the clips first and space them out in the approximate location - they don't go in easy but once they are in place they slide all over as you are installing the trim. I start in the front of the fence (middle of the trim piece and work down one side then the other. I find it's best done with at least three people and in the middle of the driveway.
 
The big thing is to plan it out and make sure each person know what they are suppose to do. Also I would start on the lowest trim piece. Any mistakes don't show up there as much and by the time you get to the 5th or 6th piece you'll have the process down.
Preparation is the key to success installing the grill trim.
It arrived from AC Parts in rolls. Once the tape holding the rolls has been cut it springs open quite a bit. It unfolds into a giant "C" shape. I found it best to have a very large table at the side of the work area to lay out the grill trim. From the "C" shape it can be gently straightened out by hand into a straight length and moved over to a plank at least 12 ft long covered in corrugated cardboard so the trim won't get scratched. The ends have to cut with a small grinding wheel to open them as they are closed in from cutting.
You can use either the original type spring clips or screws with modified heads that will slide freely in the trim.
Starting at the front and centre point of the fence it can be done with two people. One holding the free end while the other works along one side.
The trim has to be hand formed into a curve that swings away from the fence so that as it is fixed in place it sits against the fence between fixing points.
SO FAR SO GOOD. The ends of the trim have to be formed to wrap around the curved ends of the louvers. JK Howell made a special tool for this job however when I made a copy I decided to modify the design to eliminate the possibility of errors.
More to follow.
Thanks for sharing this Terry but.... It never happened without pictures...😆 Interesting it came in rolls.Many years ago mine came in a long piece of schedule 40 steel pipe threaded on both ends. Its still inside this pipe and wrapped in brown paper. I will get it down from the rafters and post some pics of it later. Our club has a member that has made a run of the spring clips. I purchased all I needed from Stan many years ago but...The box it came in was a radiator cap box that fell to the shop floor about 7 years ago. They are nearly invisible on the shop floor too.I used a magnet but still not sure.Tried to count all of them.Each different car model has a different amount of spring clips.They are nearly impossible to separate to count... So I purchased 20 extras..Am now happy...
 
 
Gary Parsons
I don't know if this is a blessing or a curse. My grill trim is a combination of clips and teeny weeny screws and nuts. See photos.My plan is to have some minor bodywork and a paint job done this winter. I will be doing some of the disassembly myself to save $$$. I was thinking it would be nice to remove the trim for the paint job buff it and replace. Now I'm thinking leave well enough alone and carefully tape the trim and forget the buffing.
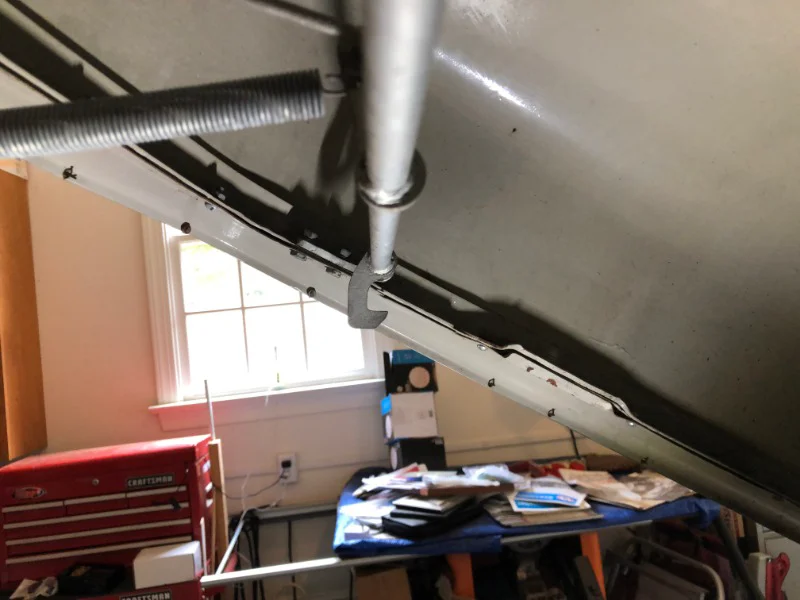
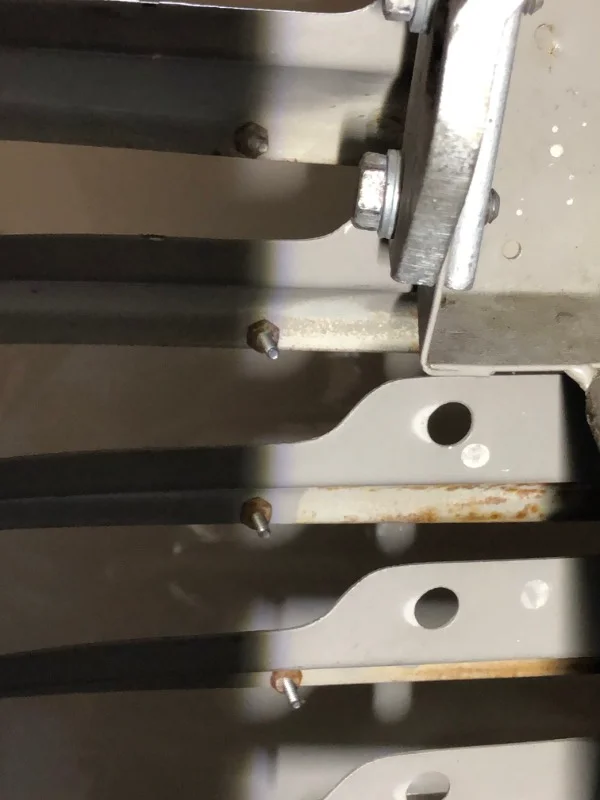
Well there you go. Removal is not a good idea unless your replacing the trim. May I suggest you buff BEFORE masking and painting. That way you wont be buffing the new paint. I recall Jim O"Brien masked off his. Then painted and the results are very nice
 
 
Gary Parsons
Leaving the trim and taping it off is actually a huge relief! Every time I looked under the hood at how the trim is secured I had a minor anxiety attack. And yes, of course, I'll buff the stainless b4 taping and painting.
Billy Bassoon
Gary my last posting finished with more to come. It is a work in progress.My wife and I finally finished fitting the first louver trim complete with curved and wrap around ends. I am glad that I modified the curve forming tool by adding a clamp with plastic jaws. This allowed me to control the curve forming operation much better. Although my wife did a great job of holding the forming tool I figured I could improve further on the design as I didn't want to run the risk of damaging the trim. The simplest solution was to fit the forming tool on a stand with height adjustment. The base can be clamped to the work table and the height adjusted to suit each louver. I think this was a good step in the right direction. After the curved end has been adjusted to suit the louver the end can be cut to length, closed up with pliers then neatly bent around the louver end. I could redesign the complete tool to be more user friendly but will leave that for another day.
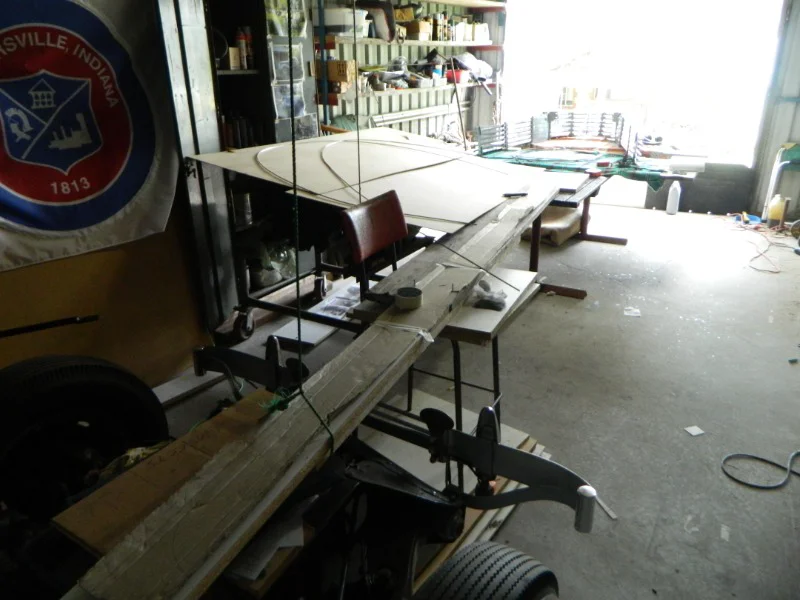
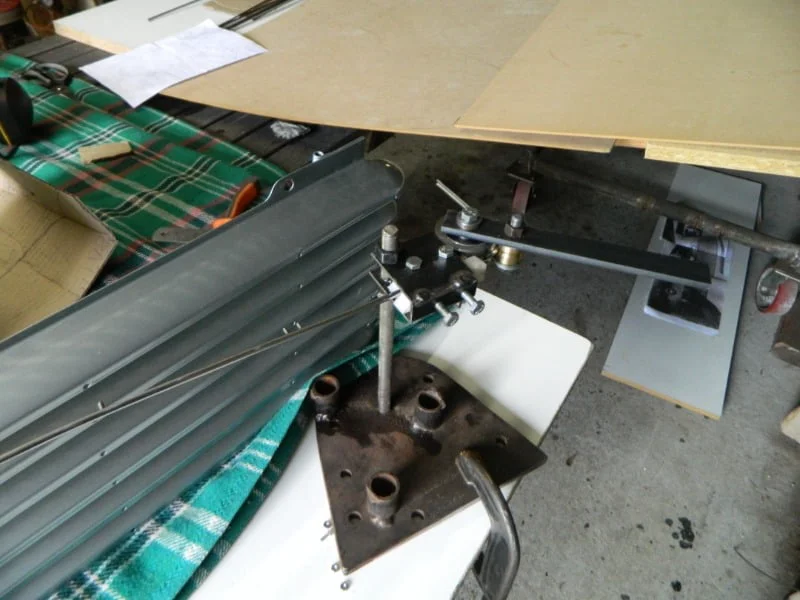
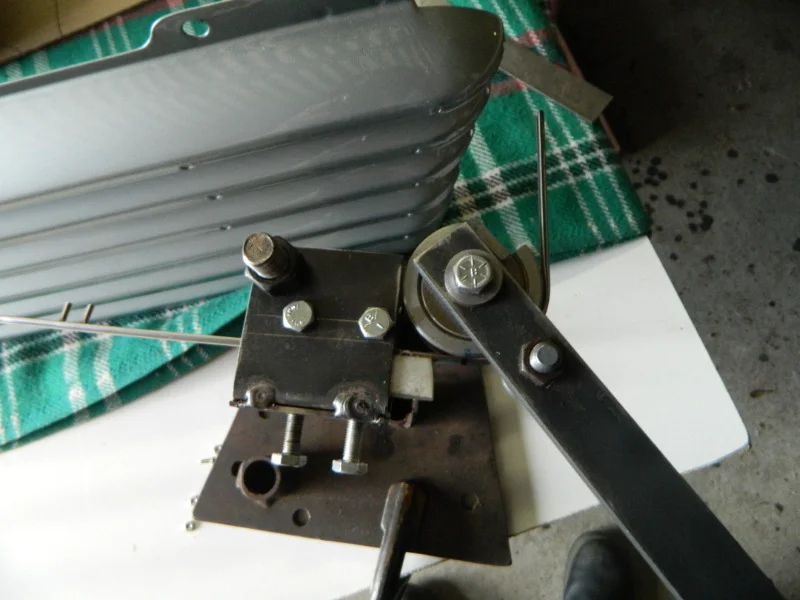
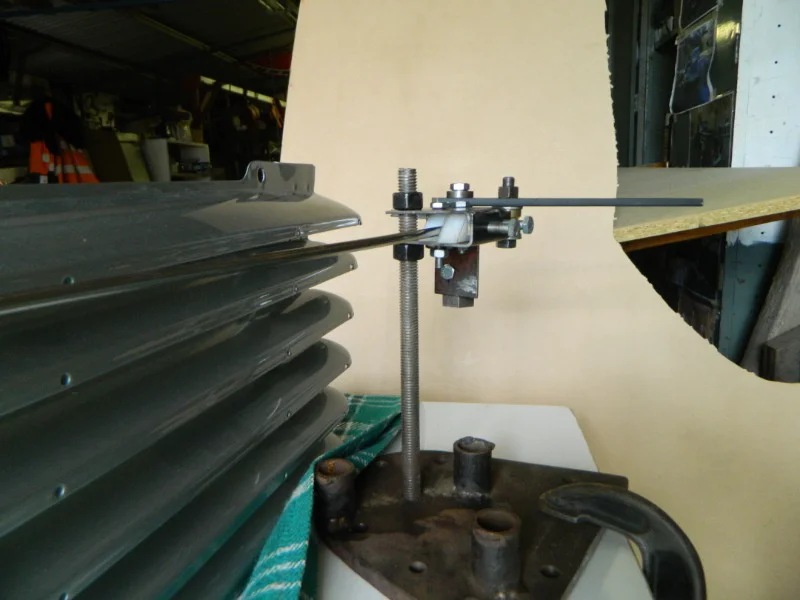
The "FENCE" and "BONNET" ( Hood ) are finally finished and ready for installation. Attached are some pictures showing the completed work.Modified stainless steel screws and nuts were used on the "FENCE" with spring clips with a few SS screws and nuts used on the "BONNET."The spring clips are quicker to use but the screws and nuts give a better finish.
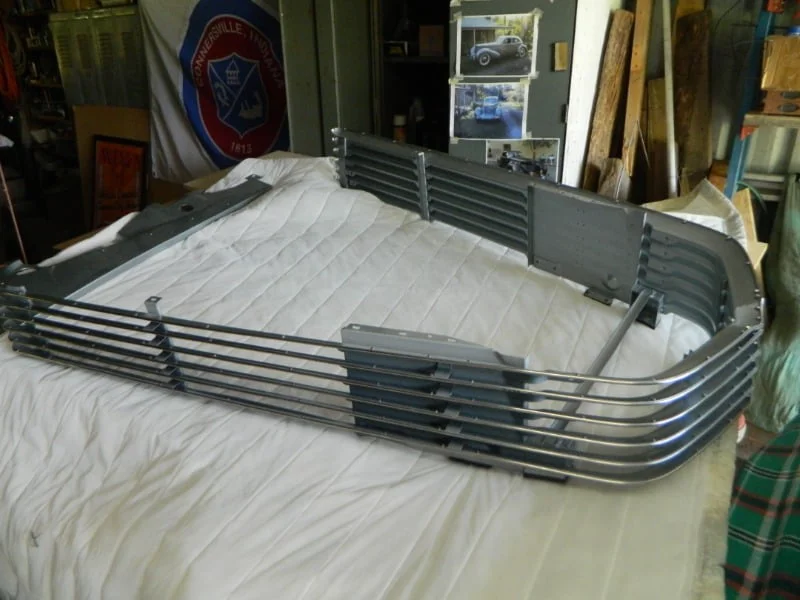
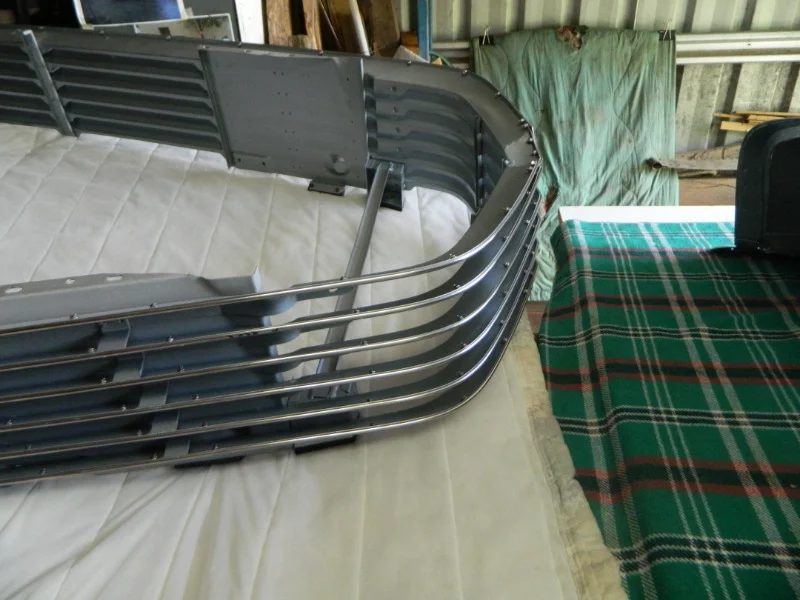
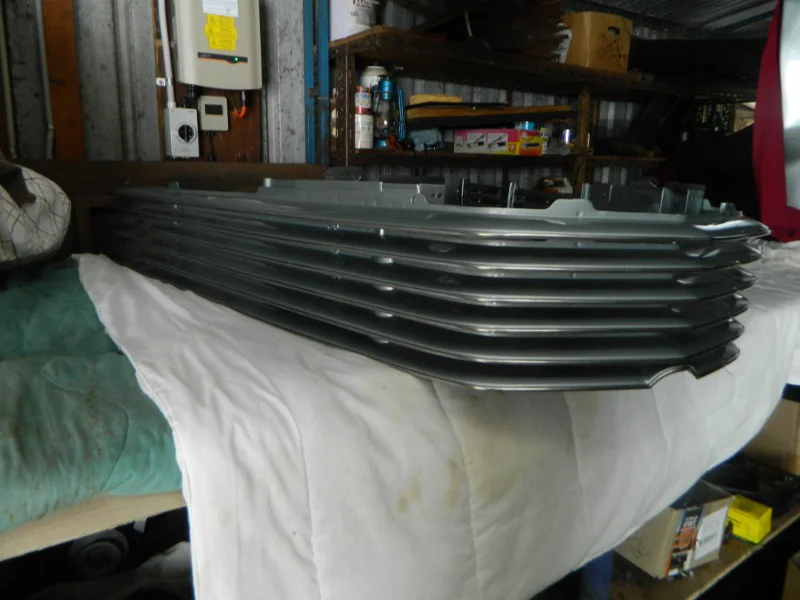
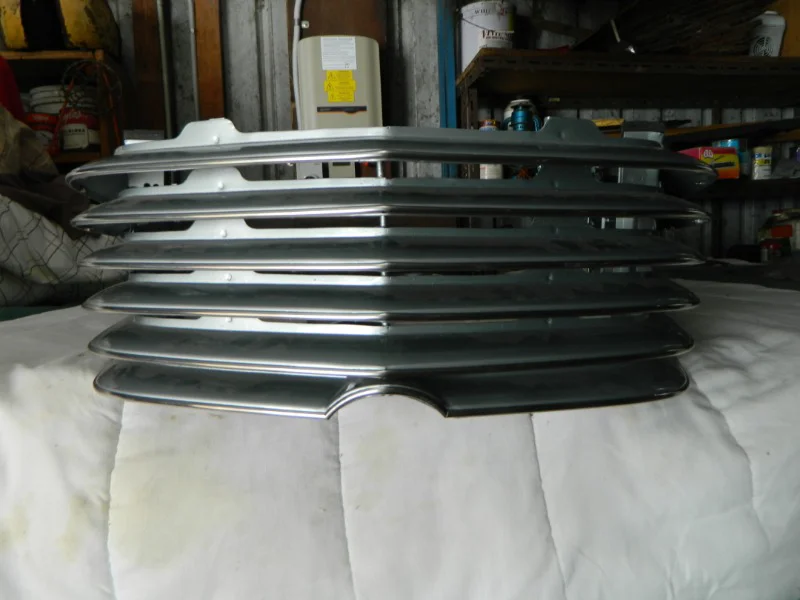
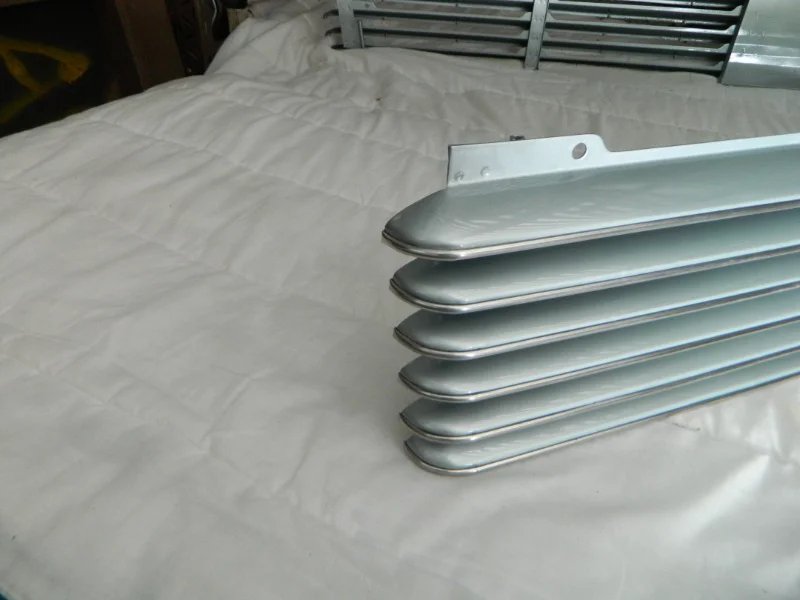
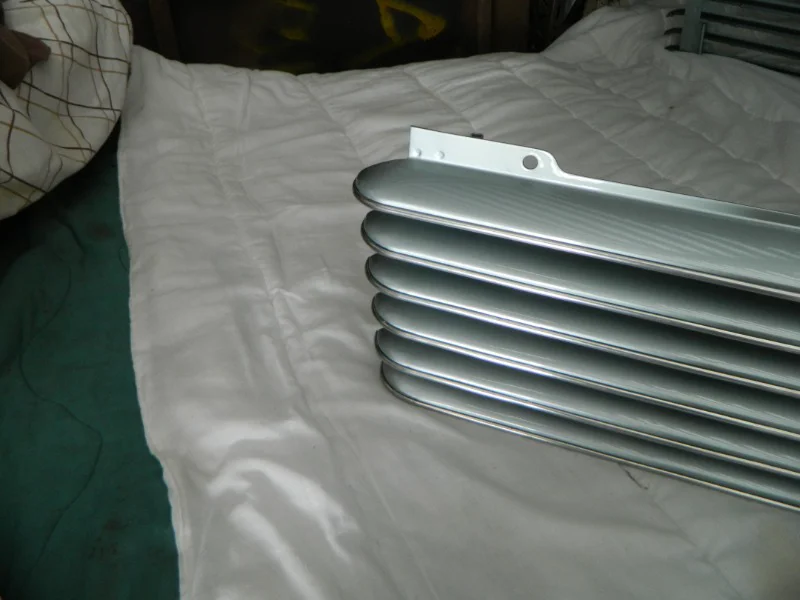
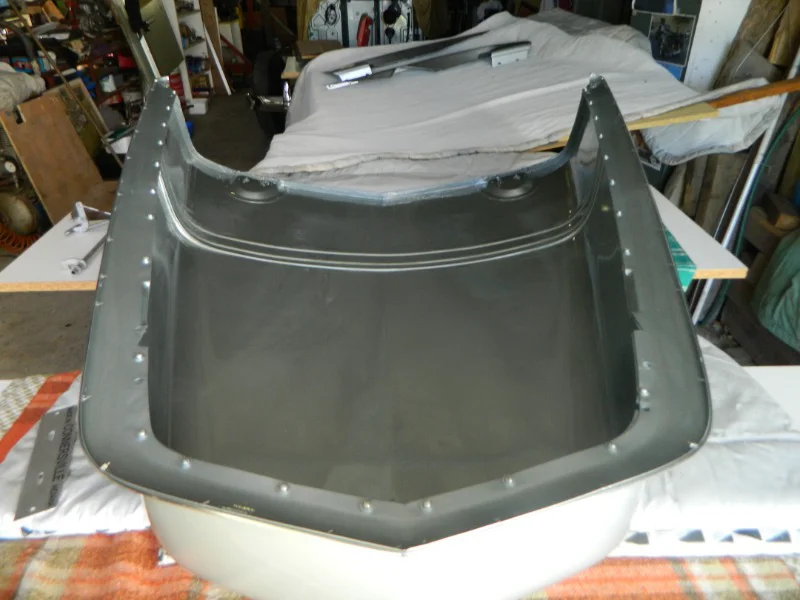
Your workmanship is wonderful Terry. I especially like the front lower bead around the very center. I'm told that area is very difficult to make. That's the only piece I have of my original chrome beading.Dad told me to never loose it too.I remember it was ALWAYS kept in a box up high in a closet in our home. It had a couple of spotlights and the complete dash instrument panel.Great memories...
 
 
Gary Parsons
Gary, the small curved piece would be difficult to form. Stan supplied it with the rest of the trim. As you mentioned yours is in a 12 ft long pipe however to make shipping more realistic they roll the lengths into coils about 2 ft diameter. It is all the same stuff but just requires a bit more work. Filing the heads of the SS screws was tedious as around 190 had to be done.
The whole job took about a week. Just take your time and don't rush it.
Terry I purchased all the Tee bolts and the spring clips from Stan probably 45 years ago. The box broke open and some fell out but I did my best to "find them" on my shop floor with a magnet.I then tried to count them all but its a horrible job to get them apart to count. So I purchased 20 of them from another member named wineleg I think. I'm a long way from installing any of this.I may purchase the piece from Stan because mine is very old looking. It may have been thru plenty of trouble over the years in the box o parts.
 
 
Gary Parsons
That may be stretching it a bit Bill it just takes care and patience.
I must admit that I was cursing a bit at the start but calmed down .
The true artists were the guys who designed the car, nothing less.
To join in the conversation, you must be a club member.
You’re welcome to read and like every post. Members can reply and start topics of their own.