@alsancle
Pull the cross shift off the front of the transmission.
1. Disconned the rod from the main shift cylinder (remove the cotter pin and pull the pin out).
2. Disconnect the oil line from the filter at the center bottom of the cross shift housing.
3. Remove the wires from the cross shift swotch.
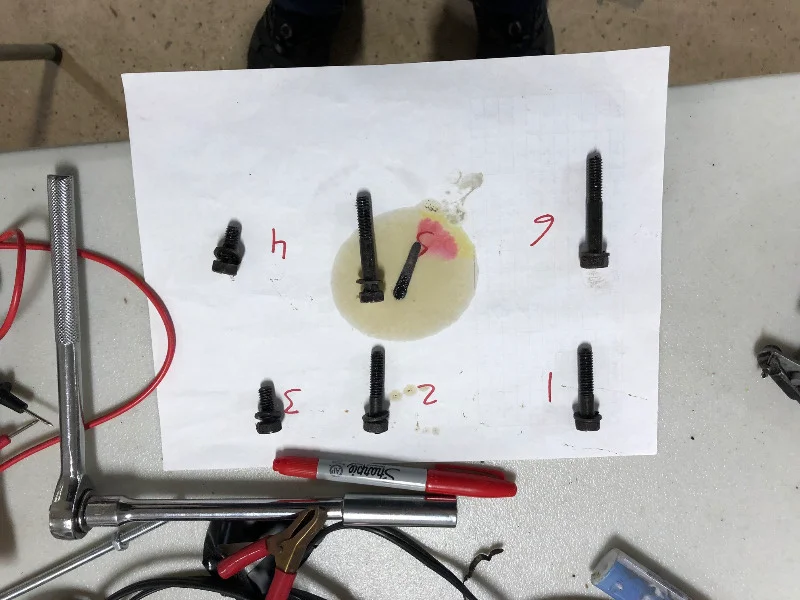
4. Remove the 6 bolts holding the cross sift houseing to the transmission - note which bolts come out of which hole - the bolts are three different lengths.
5. Remove the housing. You have to pull it straight towards the front of the car to get the pipe out of the top shaft and then wiggle it around to disengage the dogbone from the shift rails.
 
Look at the article in Newsletter #2 this year for mor info on the cross shifter.
Just a comment. The three different size bolts you speak of may not have been installed correctly last time this part was removed! Best check before putting them back same way.
CORDiallyMike
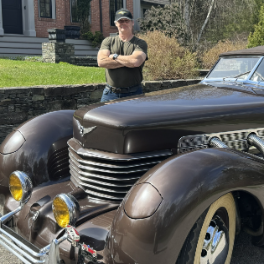
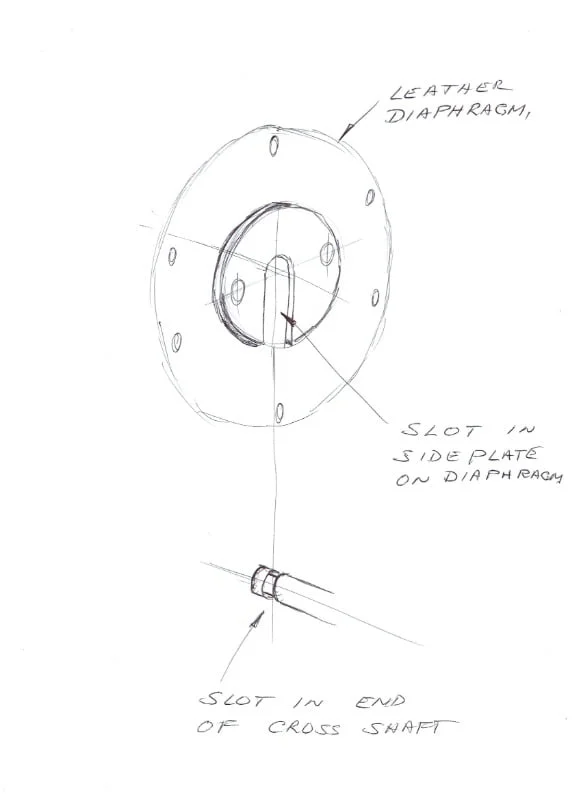
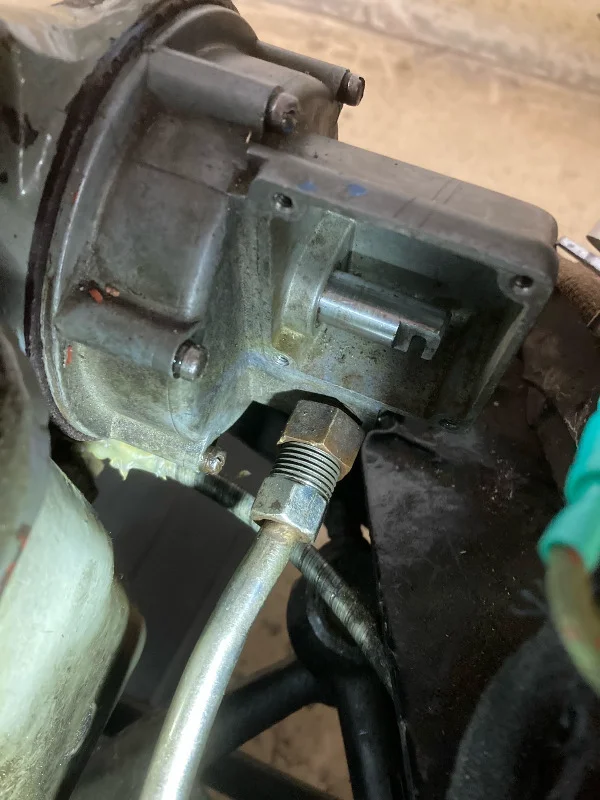
Attached is a picture showing the the leather diaphragm and slotted connection to the cross shaft.
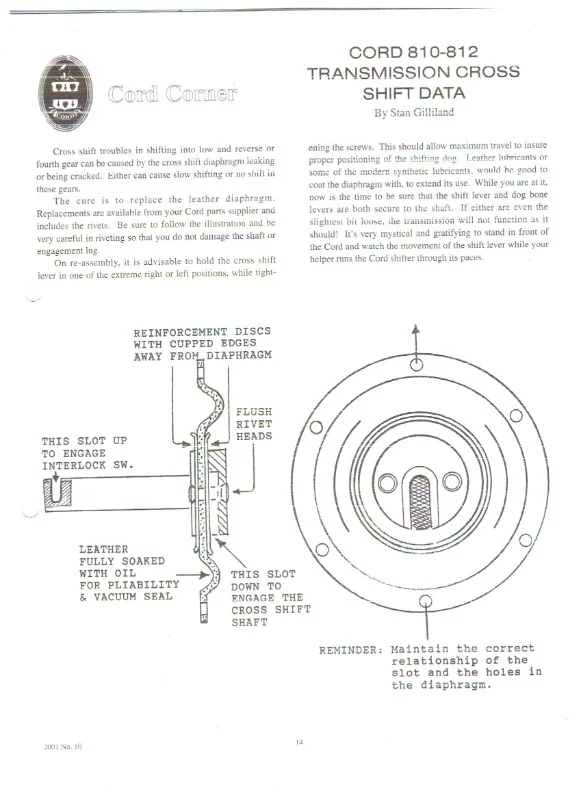
As a follow up on the last posting I had to remove the cross shift cylinder and diaphragm to fit the speedo drive. The slotted connection adjacent to the leather diaphragm allows the unit to be removed without taking the cross shaft housing off the gearbox.
 
Terry, could you explain how you did this? It feels like I'm a 1/4 of inch too tight when I pull the diaphram to the left, even with the shaft as far to the right as it will go - looking from the front.
Keep the aluminum housing close to the leather diaphragm. Just separate the leather from the cast iron cross shaft housing and try pulling it upwards. The slotted joint should separate. The slot may have been relocated check the drawing I posted earlier on page 1 of this topic.
If this does not work do as Jim suggested take the whole cross shaft assembly off the gearbox.
As much as I tried I could not get the housing and diaphragm to slide off so I ended up removing the entire cross shift assembly. I have a new bushing for that anyways so it would have had to come off to replace that.Once on the bench, it was still tough for me to slide the diaphragm off. I've given the assembly to a shop to do the replacement. It took me so long because I needed to get a 12 point 1/2 inch socket with extra thin walls to get at the #4 bolt. I didn't want to turn down one of my good Snap On sockets.I took pictures of the different bolts sizes. There seems to be 3 different lengths. Numbered clockwise starting in the upper left corner looking at the front of the transmission.
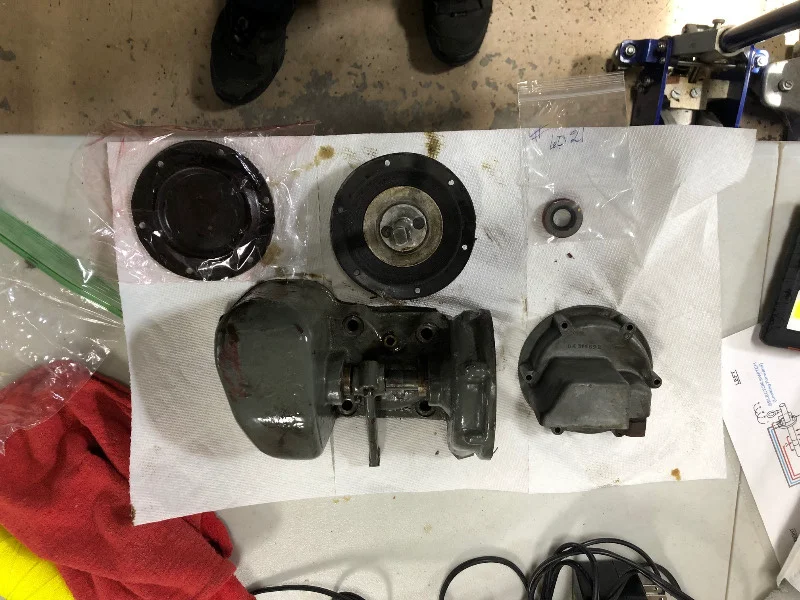
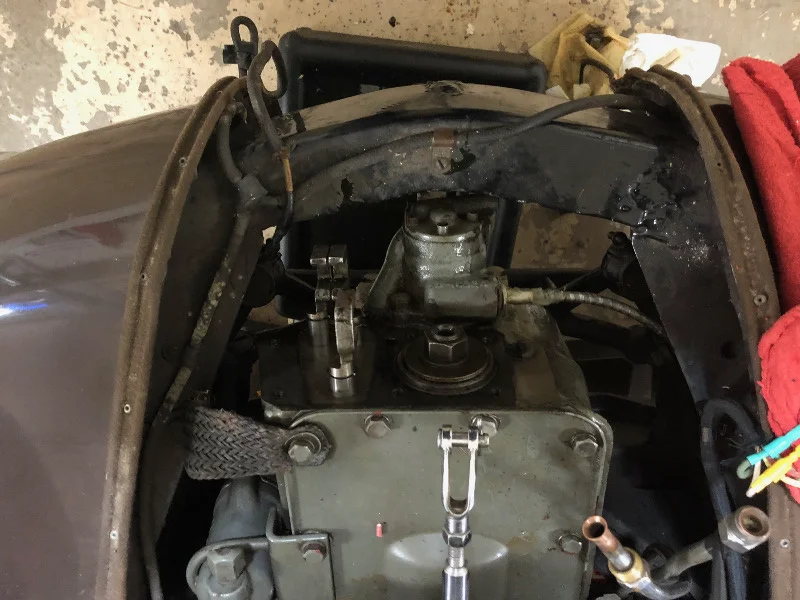
Got the new diaphragm installed, fixed the dog leg which was loose. It needed to be re-pinned and a new key made (thanks Mike for pointing this out!). Got the transmission filter cleaned, and everything reinstalled.
 
Went from having only 2nd and 3rd to having nothing. At this point I walked away for a month as I was disgusted with my trouble shooting ability. Went back to it on Saturday. Removed the interlock switch and manually moved the location of the switch by hand, and everything worked. The switch is aftermarket and I'm not sure it is aligned correctly. I'm going back to my former also a replacement switch to see what happens.
I made some progress today. I now have 3 interlock switches:1.  ACD Factory replacement from the 60s that has been in the car for 50 years.2.  A new replacement that I forget where I got it from.3.  The original I just got from an ACD club member at Hershey.The ACD replacement has been installed so I removed it but left it wired.   I noticed that by fiddling with the location manually the car would go into the gears,  but not the way you would expect it to.   Potentially mis-wired?So, I swapped in the new replacement and by manually moving the position I could get the car into every gear in the way you would expect.  I had this switch installed before and it wouldn't work which makes me think there is an alignment problem with it. I'm going to try to slot the holes.I would try the original unit,  but I can't for the life of me figure out how to wrap the lever around the shaft.  The replacements go straight in, but the original wraps around the back and points towards the switch.A.J.
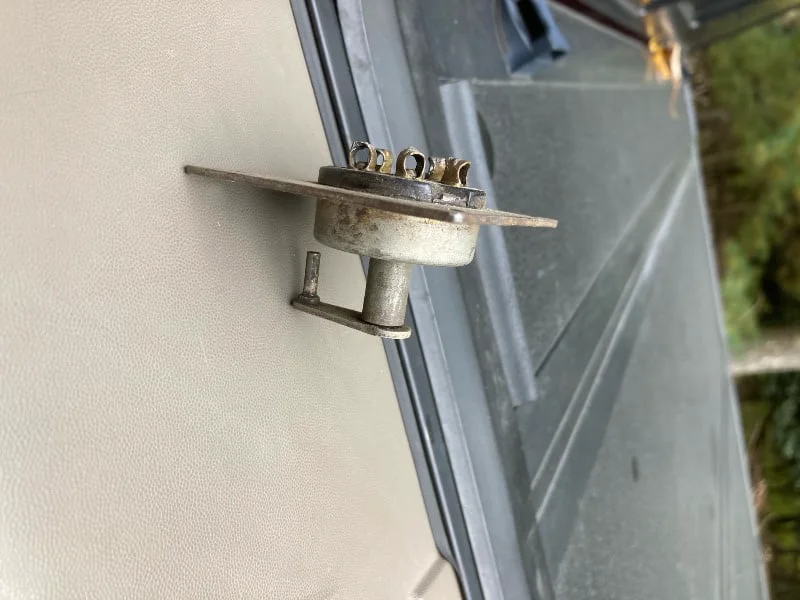
Interesting. Is the notch on top? Here is a picture of mine with the notch on the bottom which is the way I took it apart. I think.
Go back to page one of this topic and look at the drawing I had posted.
The slot is open at the top to accept the switch.
Go back to page one of this topic and look at the drawing I had posted.
The slot is open at the top to accept the switch.
 
I would say I must have put it back together upside down. That would explain some things. Thank you.
Check the slot on the other end of the shaft too. The diagram shows how it goes together correctly.
 
I was able to start my engine for the first time recently since the restoration began however when I tried selecting gears I was only able to get 4th gear. With the new looms fitted there must be an electrical problem or two somewhere to be sorted out.
For future reference here are three different interlok switches. The first two are aftermarket and the last on the right is the factory switch. The one I'm going to use is the left most that I got from Pat Leahy. I had to modify it by trimming the outer edge and elongating the holes so it could be adjusted. The middle one came from Auburn Cord Parts and was on the car for years and years. The right most one is an original which I got from a fellow club member. I also have the original out of the car which is identical but has been taken apart to fix and is a mess.
 
EDIT: I have no idea why these are upside down. Any local tool I open them with shows them with the correct orientation.
 
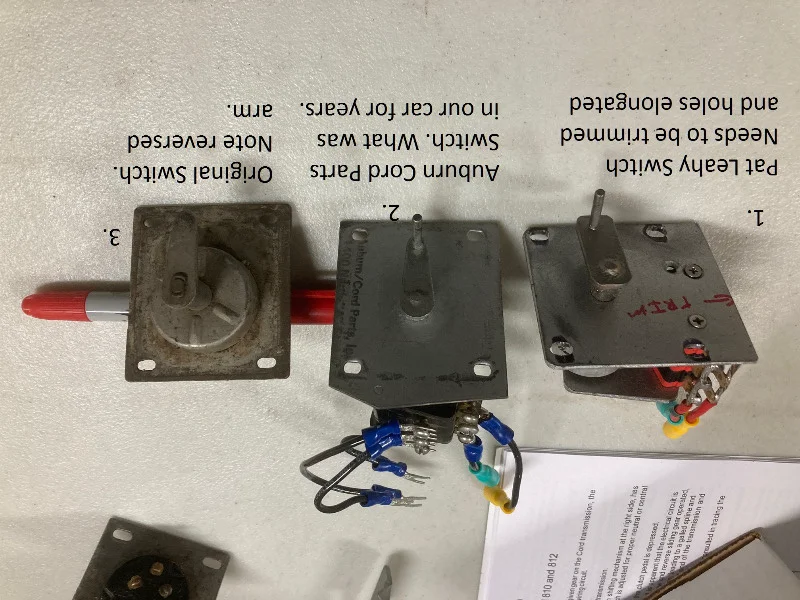
 
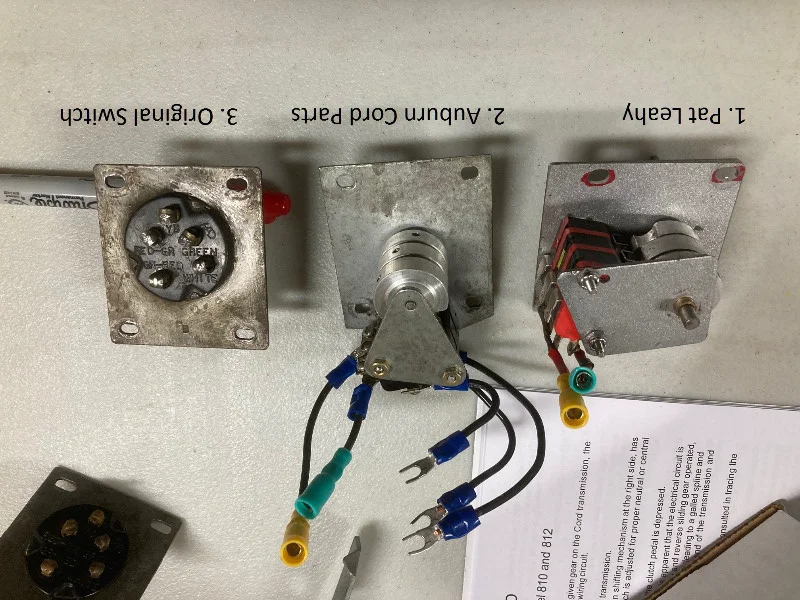
One has to assume the pictures end up inverted simply because our Cords "are" problem children.
Thanks for the update.
To join in the conversation, you must be a club member.
You’re welcome to read and like every post. Members can reply and start topics of their own.