
RU
@RumRunner
Dark Ruby glass lens has to come out to change the bulb inside and it's easier said than done.
Very easy to either break or chip the lens in it's removal. What makes it hard is that time has frozen the parts together.
The lens is held in place by the stainless steel ring around the lens. Inside the housing there are 3 butterfly spring clips that
push the lens up against the stainless steel ring. I spray WD40 around the stainless ring. If you are lucky, when you gently push in
the lens, it will move in slightly. Don't push too hard or you can crack the lens. You will notice there is a split in the stainless retainer ring.
When you gently push in the lens near this split in the ring, you have to start to pry out the ring by pushing it to the inside and then work
you way around the lens. When the ring is removed, you then can remove the lens and have access to the bulb. As you remove the stainless ring, be careful that the lens doesn't fall out. Reverse the procedure to put everything back together again. Good Luck.....Cliff
Cliff,
 
Thanks for the description. Essentially the same construct as the headlights. Now I understand how changing the bulbs jeopardizes the lenses! IÔÇÖll be very careful!
 
-Michael
Hot rod shops sell 50CP tail light bulbs. Don't use them unless you want to change bulbs a lot. They get so hot they melt the stock holding the filament. They are bright though.
CORDiallyMike
Here are the pics of the open tail light lens. The flat springs are held to the body by a brass rivet. Just drill it out to remove damaged or to remove one of the springs. Am still looking for the member who sells the flat springs on ebay.
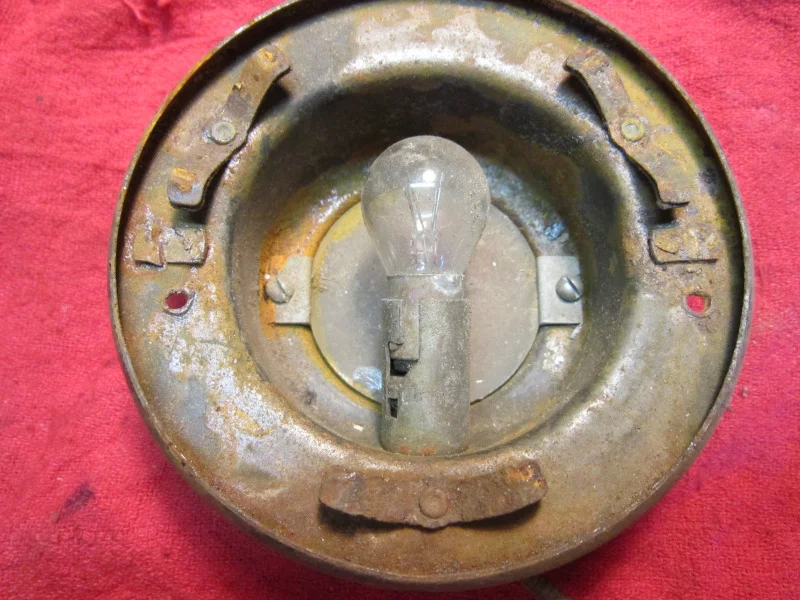
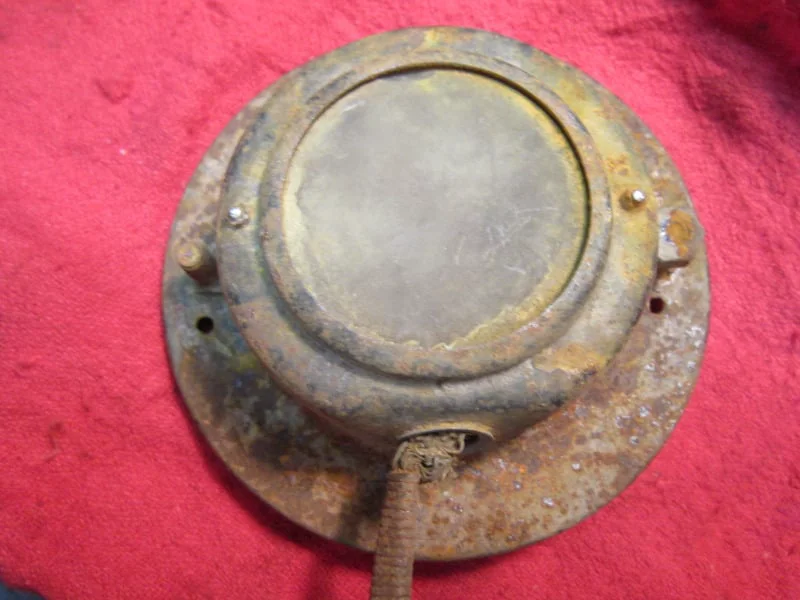
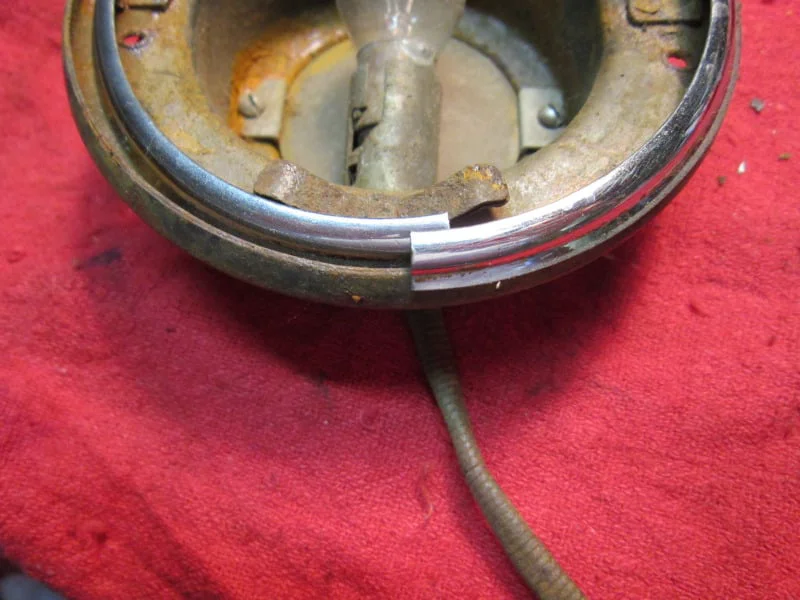
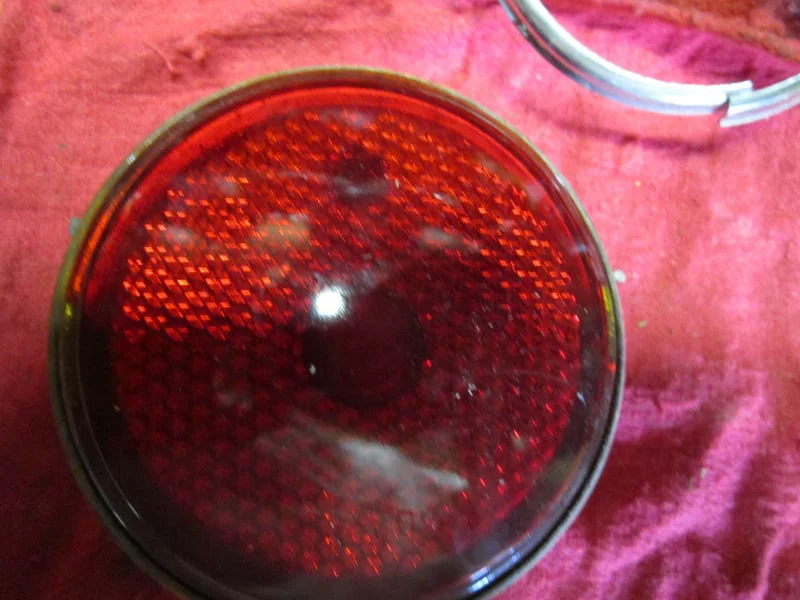
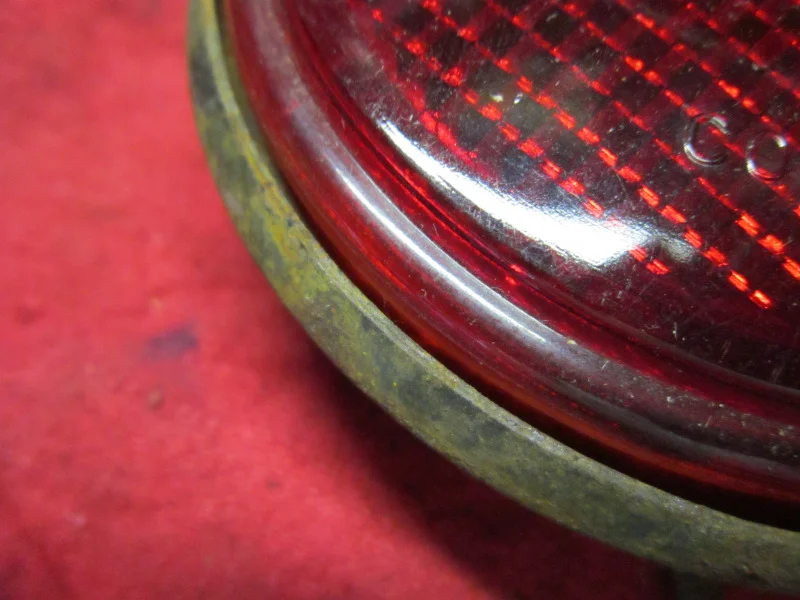
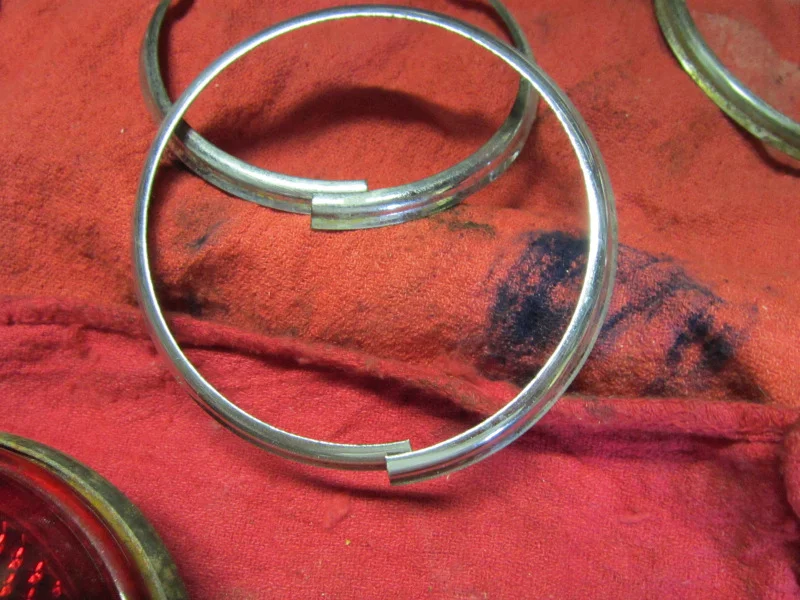
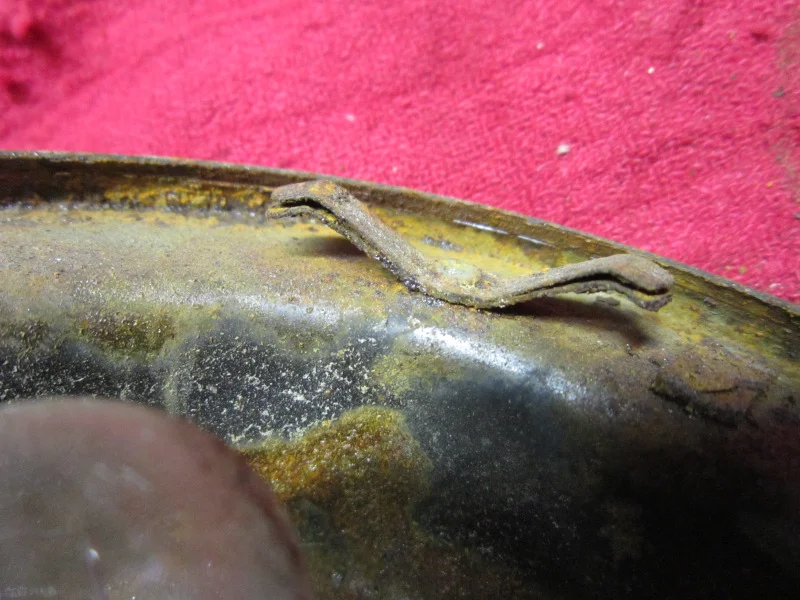
Thanks very much for posting those pictures. Gives me an idea - curious on your thoughts. First of all, on several evenings now I have gone into the garage and pressed with increasing force on the taillight lenses and they haven't budged. I am worried about breaking them as they both already have some large chips.
 
So looking at the pictures, I'm thinking about removing the frosted glass at the rear of the housing and getting at the bulbs that way. I think to get the frosted glass out I would score and break it, take it out, remove the clips that held it in place (unscrew from the inside), replace the bulbs, then use a mirror in place of the frosted glass on the outside of the housing and affix the mirror to the housing using the same screw holes that originally held the frosted glass on the inside. That way I would never have to risk breaking the outer lens.
 
Real question - do you think I can remove the the bulb itself by access through the frosted-glass hole? It looks like it's possible, but also looks like a very tight fit to get the bulb in or out even with the taillight lend off.
 
Open for thoughts ....
 
-Michael
Unfortunately there is not enough room to access the globes from the back. The globe springs are quite stiff too. The only real answer is to remove the red glass lens. Perhaps you could use a small drill press and place some rubber on the glass. The butterfly springs are way too strong. Once you have the light opened up you will see there are two butterfly springs at each of the three points. I ended up drilling out the rivets and removing one spring from each point them making and fitting new rivets.
Just be careful once the glass has been moved a little the retaining ring can be worked out.
Thanks for the feedback. Sounds like I'm going in the old fashioned way!
-Michael
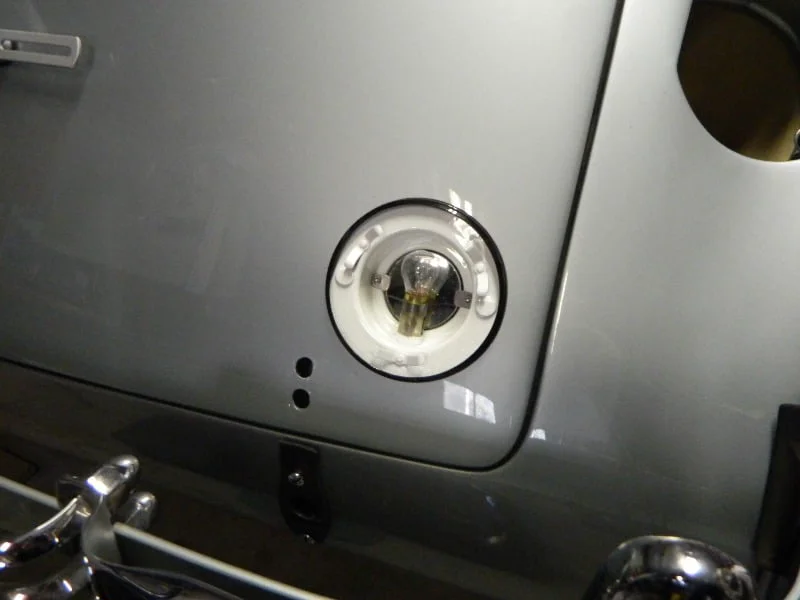
Your opinion(s) please,
I'm prepping my car for paint and wondering if I should remove the tail lights, which seems to be a daunting project OR mask the heck out of the lens, chrome ring and rubber gasket. Also, if I don't disassemble these things I have one with the chrome ring sprung partially away from it's proper position. see attachment. Any suggestions on how to push this back so it stays put? 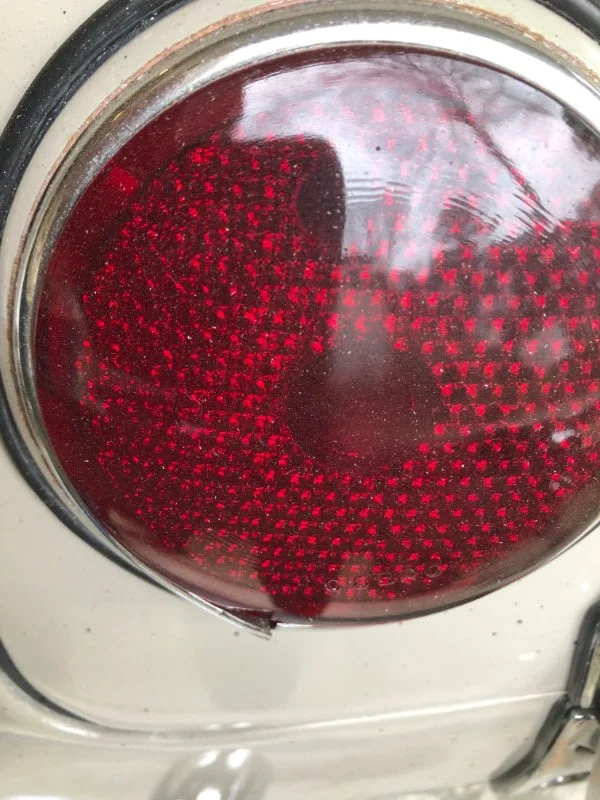
Bill... Before you do any work on these tail lights please put down some carpet or blankets. Harbor Freight has inexpensive shipping blankets that will cover the area well. Behind the red lens are 6 flat springs that act like a shot out of a cannon. In 1967 my Dad and I found this out. We removed the chrome retainer and nothing happened. Then the lens sprung out hitting Dad in the chest with great surprise. Then sadness when it hit the driveway not protected with blankets. Lots of little pieces... Cushion is your friend here. I honestly would remove the tail light buckets from the body to paint the car. They have two nuts holding them on the body from inside the trunk. Wet them with penetrating oil like PB Blaster or my favorite, Aerokroil. Work the nuts back and forth is stubborn. If you beak off a nut with the stud don't worry. They are replaceable. I have made several of these studs in stainless so they will NEVER break off or rust up again. Once the bucket is on the bench you probably can remove the retainer without issues. Most owners remove the 6 flat springs and just use three. They are double stacked in the buckets. The rivets drill out easy because they are brass and easily purchased from many places. Even the springs can be purchased from ebay but they are $17.00 each.. Ouch is what I say to that.
 
 
Gary Parsons
Bill: while you have everything apart.......I would recommend painting the inside of the housing white. I put in halogen bulbs also. To alleviate any heat build up, I drilled a hole in the side of the housing. And as you suggested, put a mirror in place of the frosted glass.
Since IÔÇÖm driving more, I want people behind me to see that my brakes are being applied!
Tim.
Bill... Before you do any work on these tail lights please put down some carpet or blankets. Harbor Freight has inexpensive shipping blankets that will cover the area well. Behind the red lens are 6 flat springs that act like a shot out of a cannon. 
Reply: Same with the Headlamp lenses and same with Auburn 951 and 852 as well. I had a fiend just look at me serious and say they would have had same luck just hitting the original with a hammer and then installing a second.
To join in the conversation, you must be a club member.
You’re welcome to read and like every post. Members can reply and start topics of their own.